Dill Salmon Hash: Brunch in Style


With brunch fresh on my mind from this morning, I thought I would share with you a make-at-home version of one of the best brunch meals I’ve had in DC! The original dish came from Domku Bar & Cafe, a Polish/Scandinavian restaurant in Petworth. Called the “Salmon Pytt i Panna”, this meal packed a flavor punch with flaky, tender salmon, sweet carrots, hearty potatoes, prominent dill flavor, and a perfectly runny egg to top it all off. I loved every bite and decided I had to re-make this delicious creation at home, with my own spin of course!

Domku’s version was served with a “dijonaisse”, essentially a dijon-flavored hollandaise sauce, but I opted to make a lighter, less calorie-dense version. I also halved the regular white potato quantity and added some sweet potato into the mix for more nutrients and extra flavor. Although I never saw their recipe for this dish, I have to say that mine tastes just like my memory of the real thing! Whether you make it for brunch, lunch, or dinner, this well-balanced meal is bursting with flavor yet not laden with excess calories. Plus it involves salmon, so what’s not to love?

For all you single ladies (and gentlemen) like me who cook for 1, this recipe is written for a single-serving. However, anyone looking to make this for their family or special someone, the recipe is also easily adaptable for larger serving sizes. With its short list of common ingredients and simple steps, this recipe can even be tackled by those still learning their way around the kitchen.

Dill Salmon Hash Ingredients:

  • 4 oz. fresh or previously-frozen salmon
  • 2 tsp diced dill
  • 1/2 medium sweet potato
  • 1/2 small white potato
  • 1/4 cup diced carrots
  • 1/4 of a sweet yellow onion
  • 1 T greek yogurt
  • 1 T dijon mustard
  • 1 lemon
  • Olive oil
  • 1 egg
  • salt + pepper

Directions:

  1. Preheat the oven to 375 degrees F.
  2. Dice the white and sweet potatoes, carrots, and the onion.
  3. Spray a baking pan with cooking spray or drizzle with olive oil, then spread out the diced potatoes, carrots, and onion onto the sheet. Drizzle with olive oil, sprinkle with salt and pepper, and top with 1 tsp dill.
  4. Bake in the oven for 40 minutes.
  5. Place the salmon on a separate oiled baking pan.
  6. Top the salmon with the juice from 1/4 of the lemon, 1 tsp dill, and salt and pepper to taste.
  7. When the potatoes have 20 minutes of cook time remaining, place the baking sheet with the salmon in the oven alongside the potatoes.
  8. While the salmon cooks, assemble the dijon dressing by combining the greek yogurt with 1/4 tsp salt, 1 T dijon mustard, and juice from 1/4 lemon.
  9. Set dijon dressing aside in the fridge.
  10. After 20 minutes, remove both the salmon and the potatoes, and set aside to slightly cool.
  11. In a small pot, heat water and a dash of vinegar over medium-high heat until you achieve a gentle boil.
  12. Crack the egg into a small bowl.
  13. Reduce the heat to medium, create a circular flow of water in the pot, and gently drop the egg into the water.
  14. Cook for about 3 minutes (for more detailed directions on how to poach an egg, check out this video http://www.bbcgoodfood.com/videos/techniques/how-poach-egg)
  15. Set poached egg onto a paper towel to remove excess water.
  16. Use a fork to flake the salmon into small pieces.
  17. Fold the salmon into the potato hash.
  18. Plate the hash and salmon mixture, add the poached egg on top, and drizzle the dijon dressing mixture over the top.
  19. Enjoy!

P.S. Mine is also topped off with a little goat cheese (because, why not?!) in case you were wondering what was with the white topping in the photo of my version! Check out my instagram: whatkateateblog for more images and a video of this meal’s “yolk porn”.


Review of Sweetgreen’s “Harvest Bowl” Salad and a Recipe for an At-Home Version

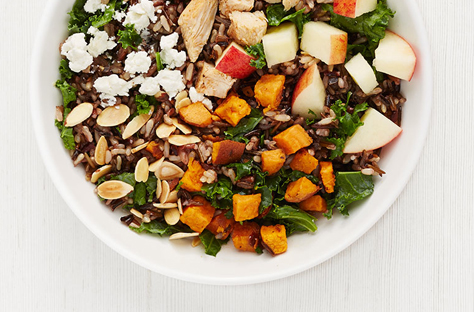
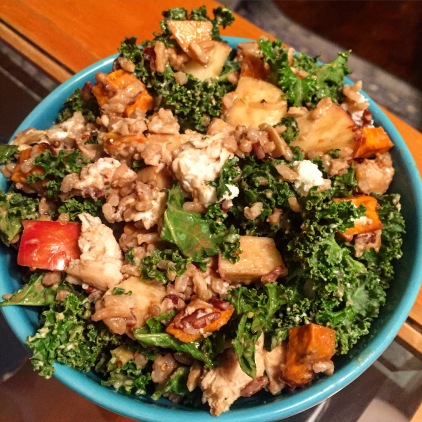
My all-time favorite salad comes from a small salad chain called Sweetgreen, and ever since I first tried it, I cannot order anything else off their menu and find myself with frequent cravings for this particular salad. Called the “Harvest Bowl”, Sweetgreen packs this kale salad with a mixture of warm ingredients like chicken and wild rice combined with crisp, chilled toppings like diced sweet potatoes, toasted slivered almonds, apples, and goat cheese. Balsamic vinaigrette brings together all these flavors to create the perfect balance between sweet and savory, and the goat cheese slightly melts to add a subtle hint of salty creaminess to each bite. A hearty, filling salad that doesn’t leave you feeling weighed down or guilty, the “Harvest Bowl” is nothing shy of salad perfection. If you are looking to keep it lighter on the calories and increase the vegetable content, I recommend asking for more kale and light on the rice. I always order mine this way and have yet to be disappointed. If you live in a city such as DC or Boston with Sweetgreen locations, go give them a try! If not, I have provided you with a simple, comprable recipe for a make-at-home version of this amazing salad. I hope you enjoy it as much as I do!

IMG_3269 (1).jpg

Mock Sweetgreen “Harvest Bowl” Salad Ingredients:

  • 1/2 small sweet potato, diced
  • 1 chicken breast
  • 1/2 C diced apple (I used Pink Lady)
  • 1/4 C wild rice
  • 1/2 C low-sodium chicken or vegetable broth
  • 1 oz. goat cheese (approx. 1/4 C crumbled)
  • 1/8 C sliced, toasted almonds
  • Kale* (amount depends on preference)
  • salt and pepper to taste
  • Dijon-balsamic vinaigrette (see recipe in “Quinoa Salad with Roasted Winter Vegetables and Dijon Vinaigrette” post, halve the listed recipe)
*If you are not a fan of kale, you can sub the kale for mixed greens, spinach, or any other type of lettuce you prefer!
Directions:
  1.  Preheat oven (or toaster oven works great!) to 375 degrees F.
  2. Place chicken breast and diced sweet potato on a greased baking sheet and sprinkle with salt and pepper.
  3. Bake at 375 degrees F for 20-25 mins, then remove chicken from sheet
  4. Turn oven up to 400 degrees F, then continue cooking diced sweet potatoes for another 10 mins.
  5. While the chicken and sweet potatoes are baking, in a small pan, bring 1/4 C wild rice and 1/2 C chicken broth to boil, then reduce to low, cover, and let simmer for 45 mins.
  6. Dice chicken breast.
  7. Follow the steps in my “Quinoa Salad with Roasted Winter Vegetables and Dijon Vinaigrette” post to make the dressing for this salad, cutting that recipe in half to make enough dressing for 1 salad.
  8. While sweet potato, diced chicken, and rice are still warm, combine with the kale, apple chunks, almonds, and goat cheese in a medium sized bowl.
  9. Toss with the dijon vinaigrette until well blended. I find that tongs work best to toss evenly.
  10. Enjoy!


Review of Chaia Restaurant and My Own Mushroom Cauli-Taco Recipe

I recently tried out a fairly new food truck-turned-restaurant in the Georgetown area of D.C. called Chaia. This place is serving up a small menu of completely vegetarian tacos. Some might be initially turned off by the lack of meat on the menu, but my philosophy is that if veggies are handled properly, they can make you forget about meat, and the Chaia tacos definitely fit into this category!

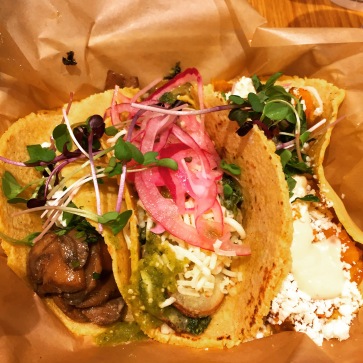
IMG_2994

I got their “market trio” option and chose to try out: the “mushroom” taco with feta, red sauce, + cilantro, the “winter squash” taco with caramelized onions, ricotta salata, chipotle yogurt, + mint, and the “creamy kale + potato” taco (which I was told was the most popular) with pepper jack, poblano crema, green sauce + pickled onions. Overall, I was underwhelmed by the “creamy kale + potato”. Although it lived up to its “creamy” name, the flavors were relatively bland and played it safe compared with the other two tacos. The “winter squash” was slightly sweet from the onions and squash but then had just the right kick of heat from the chipotle sauce on top. It accurately captured the warm, homey feel you desire from food during the mid-winter cold spell. My favorite by far, however, was the “mushroom” taco with its deep, earthy flavors finished with a nice salty, creamy hint from the feta. This taco left nothing to be desired…. except maybe the desire to eat another whole order of them! The restaurant’s atmosphere is also very clean and tastefully simple with decor that nods to the plants and land from which the tacos’ ingredients were grown, highlighting the restaurant’s farm-to-table mentality. The vibe is ideal for grabbing lunch with coworkers during the work week or stopping by for a quick snack amidst a day of M street shopping. If you’re in the area, check it out! If not, I have remade my own take on my favorite of their tacos, the “mushroom” taco, with my own healthy twist of course, making it a meal you could enjoy guilt-free on a regular basis.

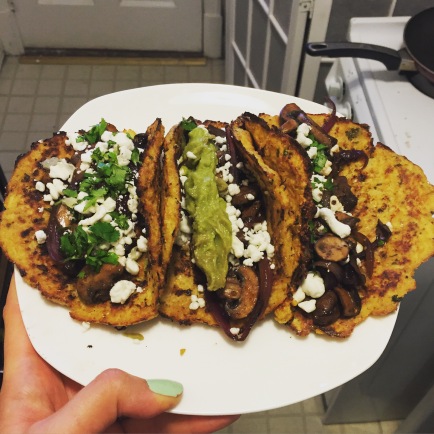
Portobello Mushroom Tacos with Cauli-Shells

IMG_3167

Ingredients:

for cauli-taco shells:

  • 1/2 C chickpeas
  • 1/4 head of cauliflower, chopped into small florets
  • juice of 1/4 of a lime
  • 1/2 T diced cilantro
  • 1 egg
  • 1/2 tsp salt
  • 1/2 tsp pepper
  • 1/2 T olive oil
  • cheese cloth (or paper towels)

for mushroom filling:

  • 1 1/2 C portobello mushrooms
  • 1/4 of a medium sized onion
  • 1 T red wine vinegar
  • 1/2 T soy sauce (gluten free for those gluten intolerants like me)
  • 1/2 T olive oil

toppings (optional):

  • goat cheese or queso fresco
  • guacamole
  • chopped cilantro

Directions:

  1. Grind chickpeas in food processor or blender until flour consistency, set aside in large bowl.
  2. Add cauliflower florets in portions into the food processor or blender, blend until the cauliflower has a thick paste consistency with no visible chunks. Set each batch of blended cauliflower aside in a small bowl (See image below).
  3. When all the cauliflower is blended, place the entire cauli mixture in the center of a cheese cloth sheet and wring out excess water by squeezing the cheese cloth. If you don’t have cheese cloth, you can use a few sheets of paper towel to squeeze the excess water from the cauliflower instead.
  4. Add the cauliflower to the bowl of chickpea flour, and then add the oil, lime, cilantro, egg, salt + pepper.
  5. Mix until well combined. The mixture should be a sticky paste consistency.
  6. Spread out mixture on a well-greased cookie sheet to form 3 thin circles (each about 1/4 inch thick). (See image below)
  7. Bake at 375º F for 20-25 minutes, or until the taco shells are slightly browned and hold together when removed from the sheet.
  8. Heat frying pan on medium-high heat, grease well with either PAM or 1 tsp. olive oil.
  9. Place each taco shell, one at a time, into pan, frying on each side for 2-3 minutes. Be sure to re-oil pan in between each shell.
  10. In separate frying pan, add 1/2 T olive oil and heat on medium-high heat.
  11. Thinly slice red onion + portobello mushrooms, then add to the pan of oil.
  12. Saute mushrooms and onions for 5-6 minutes until tender, stirring regularly.
  13. Turn down heat to low, add in vinegar and soy sauce.
  14. Cook for an additional 3-5 minutes until mixture appears slightly caramelized and no liquid remains. (See image below)
  15. Divide mushroom and onion mixture between the 3 taco shells, add desired toppings, and enjoy!

I like to add goat cheese because it slightly melts and adds a creaminess that complements the earthiness of the mushrooms and the sweetness from the onions, plus goat cheese, in my opinion, is the best cheese of them all. I also topped one of my tacos with guacamole too because everything is better with a little guacamole!

If you aren’t a fan of mushrooms, you can also just use this cauli-taco shell recipe and make traditional ground beef tacos, chicken tacos, the possibilities are really endless! Keep your eye out because I will be posting my own ideas soon for some alternative fillings to put in these cauli-shells in the near future. I’ll definitely be posting my on tae on a fish taco because those are my all-time favorite, but let me know if you have any other suggestions for some tacos you’d like to see!